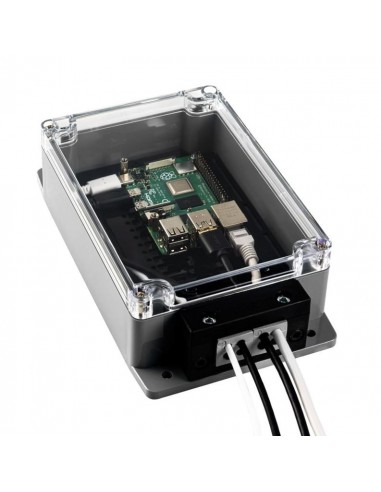
Setting up a remote IoT Raspberry Pi project can be an exciting and rewarding endeavor for beginners. The Raspberry Pi, with its versatility and affordability, has become a popular choice for Internet of Things (IoT) projects. Whether you're monitoring environmental conditions, controlling smart home devices, or building complex automation systems, the Raspberry Pi offers endless possibilities. This guide will walk you through setting up your Raspberry Pi for remote access, enabling you to manage and interact with your device from anywhere in the world.
Before diving into the specifics, it's important to understand the basics of remote connectivity. Remote access allows you to connect to your Raspberry Pi over the internet, bypassing the need for physical proximity. This is particularly useful for IoT projects where devices may be located in hard-to-reach places. By following this step-by-step guide, you'll learn how to configure your Raspberry Pi for secure remote access using tools like SSH and remote desktop protocols. Let's get started!
Configuring SSH Tunnel for Secure Remote Access
SSH (Secure Shell) is one of the most common methods for remotely accessing a Raspberry Pi. To set up an SSH tunnel for secure remote access, you'll first need to enable SSH on your Raspberry Pi. This can typically be done by navigating to the Raspberry Pi Configuration tool or by placing an empty file named ssh on the boot partition of your SD card. Once enabled, SSH allows you to securely log into your Raspberry Pi from another computer using a terminal application.
For enhanced security, consider configuring your SSH service with additional options. For instance, you can disable password authentication and use public key authentication instead. This method involves generating an SSH key pair on your local machine and adding the public key to the authorized_keys file on your Raspberry Pi. By doing so, you eliminate the risk of brute-force password attacks, making your setup more secure.
In addition to basic SSH configuration, you might want to explore advanced features such as port forwarding. Port forwarding allows you to securely access services running on your Raspberry Pi from outside your local network. For example, you could forward traffic from a specific external port on your router to the SSH port (default is 22) on your Raspberry Pi, enabling remote access over the internet. However, always ensure that your router's firewall settings are properly configured to prevent unauthorized access.
Enabling Remote Desktop Access Over the Internet
Beyond SSH, another popular method for remote access is using a remote desktop protocol. This allows you to view and control the graphical user interface of your Raspberry Pi from another computer. To enable remote desktop access, you'll need to install a VNC (Virtual Network Computing) server on your Raspberry Pi. Popular choices include TightVNC and RealVNC, both of which offer robust features for remote desktop connections.
Once the VNC server is installed and configured, you can connect to your Raspberry Pi using a VNC client on your local machine. This is especially useful if you prefer working with a graphical interface rather than relying solely on the command line. Additionally, many VNC servers support encryption, ensuring that your remote desktop sessions remain secure from potential eavesdroppers.
When setting up remote desktop access over the internet, it's crucial to address potential security concerns. One approach is to use a reverse SSH tunnel to securely connect to your Raspberry Pi from outside your local network. This method involves initiating the SSH connection from your Raspberry Pi to a remote server, effectively bypassing any firewall restrictions imposed by your router. As a result, you can establish a secure and reliable connection without exposing your Raspberry Pi directly to the internet.
Optimizing Development with VS Code Remote
Visual Studio Code (VS Code) is a powerful code editor that supports remote development through its Remote Development extension pack. This extension enables you to develop and debug applications directly on your Raspberry Pi from the comfort of your local machine. By leveraging the Remote SSH extension, you can seamlessly connect to your Raspberry Pi and work on your IoT projects as if you were coding locally.
One of the standout features of the Remote SSH extension is its ability to provide a fully integrated development environment (IDE) experience. This includes IntelliSense, debugging tools, and version control integration, all tailored specifically for remote development. Furthermore, the extension supports various operating systems, including Linux distributions commonly used on Raspberry Pi devices, such as Raspbian and Ubuntu.
For those interested in IoT development, VS Code offers additional extensions that enhance productivity. For example, the Azure IoT Tools extension simplifies the process of connecting to Azure IoT Hub and deploying cloud-based solutions. By combining these tools with the capabilities of your Raspberry Pi, you can create sophisticated IoT applications that integrate seamlessly with cloud services, expanding the scope of your projects beyond traditional hardware limitations.
Displaying Raspberry Pi Output Without HDMI
In some scenarios, you may not have access to an HDMI display for your Raspberry Pi. Fortunately, there are alternative methods for viewing your Raspberry Pi's output remotely. One option is to use Windows IoT Core, which allows you to connect to your Raspberry Pi via a web interface or mobile app. This eliminates the need for a physical display, making it ideal for headless operations.
Another approach is to utilize remote desktop solutions, as discussed earlier. By connecting to your Raspberry Pi's graphical interface, you can interact with your device as if you were sitting right in front of it. This is particularly useful for troubleshooting or performing administrative tasks that require a visual interface. Additionally, many remote desktop clients support clipboard sharing and file transfers, enhancing the overall usability of your Raspberry Pi.
If you prefer a lightweight solution, consider using a text-based terminal emulator. Programs like PuTTY or MobaXterm allow you to establish SSH connections to your Raspberry Pi and execute commands directly from your local machine. While this method lacks the graphical capabilities of a full-fledged remote desktop, it provides a fast and efficient way to manage your Raspberry Pi remotely, especially for users familiar with the command line.
Scaling IoT Projects with Multiple Raspberry Pi Devices
As your IoT projects grow in complexity, you may find yourself managing multiple Raspberry Pi devices spread across various locations. To handle such scenarios efficiently, consider implementing a centralized management system. This could involve setting up a dedicated server to act as a gateway for all your Raspberry Pi devices, allowing you to monitor and control them from a single point of access.
When dealing with large-scale deployments, security becomes paramount. Implementing robust authentication mechanisms and regularly updating your devices' firmware can help mitigate potential vulnerabilities. Additionally, leveraging third-party IoT remote access solutions, such as SocketXP, can provide an added layer of security by encrypting all communications between your devices and the central server.
Finally, consider automating routine tasks using scripts or orchestration tools. This not only reduces the burden of manual intervention but also ensures consistency across all your devices. By adopting these best practices, you can effectively scale your IoT projects while maintaining reliability and security.
Enhancing Debugging Capabilities with Remote Tools
Debugging is an essential part of any development process, and remote debugging tools can significantly streamline this task. With Visual Studio Code's Remote Development extension, you can attach a debugger to your Raspberry Pi and gain real-time insights into your application's behavior. This capability is invaluable when diagnosing issues that occur only in specific environments or under certain conditions.
Remote debugging also facilitates collaboration among team members. By granting access to your Raspberry Pi's development environment, other developers can contribute to your project without needing direct access to the physical device. This fosters a more collaborative workflow, accelerating the development process and improving overall productivity.
Regardless of whether you're using Linux or Windows IoT Core on your Raspberry Pi, the principles of remote debugging remain largely the same. The key lies in selecting the right tools and configurations to suit your specific needs. By mastering these techniques, you'll be well-equipped to tackle even the most challenging IoT projects with confidence.
